
Understanding Sloped Yards in Loganville, GA
Loganville sits at the crossroads of Walton and Gwinnett counties, just off Highway 78 and the Grayson–Loganville corridor. Many residential properties here feature gently rolling lawns or more pronounced inclines that add character but also present unique challenges for outdoor events. A sloped yard can affect how water drains, where a tent footprint rests, and how guests move between areas. Recognizing the degree of slope, soil stability, and local drainage patterns is the first step in turning that uneven space into a safe, comfortable venue for weddings, family reunions, or corporate picnics.
Loganville sits at the intersection of Walton and Gwinnett counties, just off Highway 78 and the Grayson‑Loganville corridor. Many residential properties here have gently rolling lawns or steeper slopes that add character but also bring unique challenges for outdoor events. A sloped yard can affect water drainage, where a tent’s footprint sits, and how guests move around. Recognizing the slope degree, soil stability, and local drainage patterns is the first step to turning that uneven space into a safe and comfortable venue for weddings, family reunions, or corporate picnics.
Typical slopes in the Loganville area range from a modest 5‑degree pitch to steeper 12‑degree gradients on the edges of larger lots. While a modest incline often only requires a few extra ground stakes, steeper sections may need temporary decking or platform blocks to create a level surface for the tent structure. Consulting a professional site survey early ensures that you understand the exact topography, allowing the planning team to recommend the appropriate tent size, anchoring system, and any necessary grading work before the event date.
Typical slopes in the Loganville area vary from a modest 5‑degree pitch to steeper 12‑degree gradients on the edges of larger lots. While a modest incline often only needs a few extra stakes, the steeper sections may require temporary decking or platform blocks to create a level surface for the tent structure. Consulting a professional site survey early ensures you understand the exact topography, allowing the planning team to recommend the right tent size, anchoring system, and any needed grading work before the event date.
Choosing the Right Tent for a Sloped Yard Loganville GA
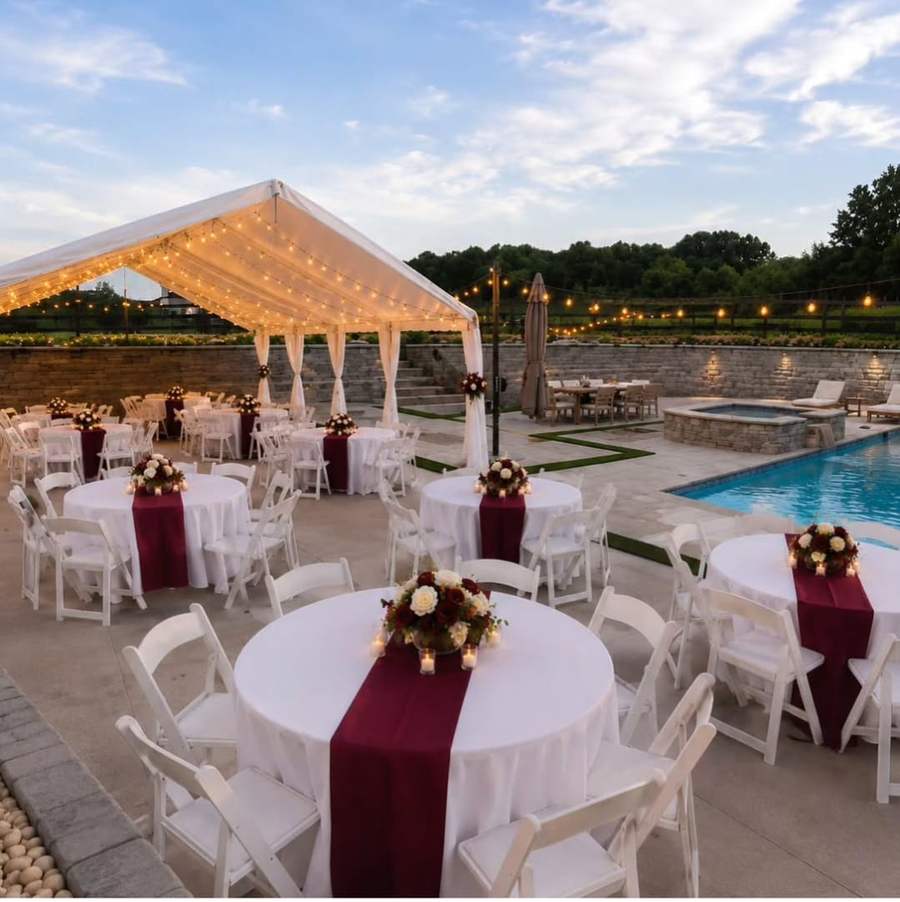
Selecting a tent that matches the slope’s demands is crucial for safety and aesthetic appeal. Our commercial COBIZI tents are built with galvanized steel frames and waterproof, UV‑protected covers, making them ideal for varied terrain. For gentle slopes, a standard 20×30 or 20×40 canopy can often be set directly on the grass, using adjustable leg extensions to compensate for the tilt. For steeper inclines, a larger 30×60 tent provides additional structural rigidity and allows placement of internal support beams that help keep the fabric taut and stable.
Selecting a tent that meets the slope’s requirements is critical for safety and visual appeal. Our commercial COBIZI tents are constructed with galvanized steel frames and waterproof, UV‑protected covers, making them perfect for varied terrain. For gentle slopes, a standard 20×30 or 20×40 canopy can often be placed directly on the grass, using adjustable leg extensions to compensate for the tilt. For steeper inclines, a larger 30×60 tent offers greater structural rigidity and allows internal support beams that help keep the fabric tight and stable.
When deciding on tent size, think about the intended guest count and the layout you want. A 20×30 tent comfortably seats 48‑60 guests at round tables, while the same space can accommodate up to 25 cocktail‑style standing guests. If your event expects more than 80 guests, a 30×60 tent offers the flexibility to create separate dining, lounge, and dance zones while still providing a level platform. The right tent size also influences the amount of draping or lighting you can integrate without over‑loading the structure.
When choosing tent size, consider your expected guest count and desired layout. A 20×30 tent comfortably seats 48‑60 guests at round tables, while the same space can hold up to 25 standing guests in cocktail style. If your event expects more than 80 guests, a 30×60 tent gives you the flexibility to create separate dining, lounge, and dance areas while still providing a level platform. The right tent size also affects how much draping or lighting you can add without over‑loading the structure.
Site Preparation and Grading Tips
Preparing a sloped yard starts with clearing the area of debris, rocks, and any low‑lying vegetation that could puncture the tent floor. Next, mark the tent’s footprint using string or a chalk line, ensuring the outline follows the natural contour of the yard. For slopes steeper than 8 degrees, we recommend laying down a series of interlocking wooden or composite decking panels. These panels create a flat, load‑bearing surface that distributes the tent’s weight evenly and reduces the risk of the fabric sagging into a dip.
Preparing a sloped yard begins by clearing debris, rocks, and low‑lying vegetation that could puncture the tent floor. Then mark the tent footprint with string or a chalk line, making sure the outline follows the yard’s natural contour. For slopes greater than 8 degrees, we recommend installing a series of interlocking wood or composite decking panels. These panels create a flat, load‑bearing surface that evenly distributes the tent’s weight and reduces the chance of the fabric sinking into a dip.
After decking, compact the underlying soil with a plate compactor or hire a local landscaper to grade the edges. This prevents water from pooling around the tent’s base, which can cause a suction effect that pulls the tent inward during rain. Adding a temporary drainage trench along the lower side of the slope helps channel runoff away from the structure. All these steps are performed by our trained crew, who coordinate with you to protect existing landscaping and restore the yard after the event.
After decking, compact the underlying soil with a plate compactor or hire a local landscaper to grade the edges. This prevents water from pooling around the tent’s base, which can create a suction effect that pulls the tent inward during rain. Adding a temporary drainage trench along the lower side of the slope helps channel runoff away from the structure. All these steps are performed by our trained crew, who work with you to protect existing landscaping and restore the yard after the event.
Anchoring and Safety on Uneven Ground
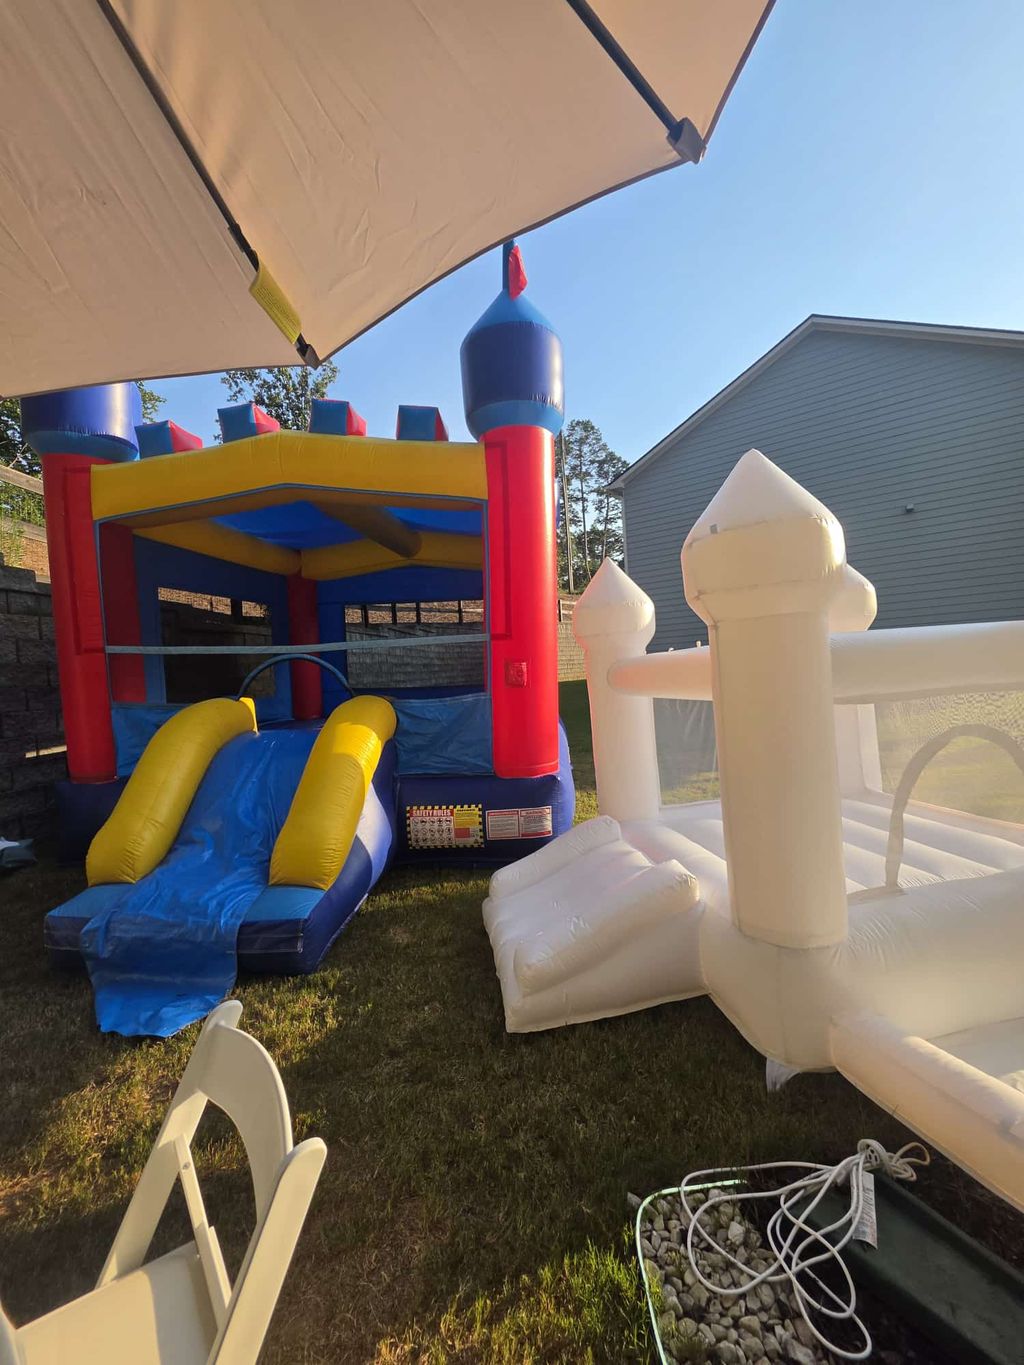
Anchoring a tent on a sloped surface requires a combination of ground stakes, weighted sandbags, and, in some cases, concrete anchors. For grassy sections, heavy‑duty steel stakes driven at a 45‑degree angle provide reliable pull‑out resistance. On steeper or softer soil, we supplement with sandbag anchors placed at the tent corners and along the ridge line. These sandbags are filled with clean, dry sand and securely strapped to the tent legs, balancing the forces caused by wind and the uneven load.
Anchoring a tent on a sloped surface needs a mix of ground stakes, weighted sandbags, and sometimes concrete anchors. For grassy areas, heavy‑duty steel stakes driven at a 45‑degree angle give reliable pull‑out resistance. On steeper or softer soil, we add sandbag anchors at the tent corners and along the ridge line. These sandbags are filled with clean, dry sand and securely strapped to the tent legs, balancing wind forces and the uneven load.
In locations where the slope exceeds 10 degrees, we sometimes install temporary ground plates—steel or polymer pads that sit beneath the tent legs. These plates spread the load over a larger area, preventing the legs from sinking into softer ground. All anchoring methods are inspected by a certified safety officer before the event starts, ensuring compliance with local fire and safety regulations. Guests will never notice the extra hardware because it is hidden beneath the tent skirt or integrated into decorative drape.
In areas where the slope exceeds 10 degrees, we sometimes install temporary ground plates—steel or polymer pads that sit beneath the tent legs. These plates spread the load over a larger area, preventing the legs from sinking into softer ground. All anchoring methods are inspected by a certified safety officer before the event begins, ensuring compliance with local fire and safety codes. Guests will never see the extra hardware because it is hidden beneath the tent skirt or integrated into decorative draping.
Guest Capacity Planning and Layout Math
Accurate guest‑count math helps you avoid overcrowding while making the most of a sloped yard’s dimensions. For a 20×30 tent on a moderate slope, a typical layout includes six 5‑foot round tables, each seating eight guests comfortably, plus a cocktail area along the entrance. This configuration yields a total of 48 seated guests, leaving ample space for a dance floor or a catering station on the level platform.
Accurate guest‑count calculations help you avoid overcrowding while making the most of a sloped yard’s dimensions. For a 20×30 tent on a moderate slope, a typical layout includes six 5‑foot round tables, each comfortably seating eight guests, plus a cocktail area by the entrance. This setup provides a total of 48 seated guests, leaving plenty of space for a dance floor or catering station on the level platform.
If you anticipate a larger gathering, a 30×60 tent can host twelve 6‑foot round tables (10 guests each) for a total of 120 seated guests, plus an additional 40‑50 standing guests in a cocktail lounge situated on the higher side of the slope. By staggering tables along the slope’s natural contour, you create visual interest and allow clear pathways for service staff. Always factor in a 3‑foot clearance around each table for ease of movement, especially when the ground is not perfectly flat.
If you expect a larger gathering, a 30×60 tent can accommodate twelve 6‑foot round tables (10 guests each) for a total of 120 seated guests, plus an additional 40‑50 standing guests in a cocktail lounge on the higher side of the slope. Staggering tables along the natural contour of the slope creates visual interest and clear pathways for staff. Always allow a 3‑foot clearance around each table for easy movement, especially when the ground isn’t perfectly flat.
Timeline: From Delivery to Dismantle
Our typical timeline for a sloped‑yard setup begins 10 hours before the event start time. Delivery trucks arrive at the Loganville address, and the crew conducts a final site walk to confirm the exact placement of decking, drainage, and anchor points. Within the first two hours, the temporary platform is assembled, and the tent frame is erected using hydraulic lifts that keep the crew level on the incline. Lighting rigs, draping, and furniture follow, with a final safety inspection completed one hour before guests arrive.
Our typical timeline for a sloped‑yard setup starts 10 hours before the event start time. Delivery trucks arrive at the Loganville address, and the crew does a final site walk to confirm the exact placement of decking, drainage, and anchoring points. In the first two hours, the temporary platform is assembled and the tent frame is raised using hydraulic lifts that keep the crew level on the slope. Lighting rigs, draping, and furniture follow, with a final safety inspection one hour before guests arrive.
After the celebration, dismantling starts no later than one hour after the event’s official end. The tent is lowered in the reverse order of installation, ensuring that any decking or weighted sandbags are removed safely. Cleanup crews then grade the site, remove any temporary drainage, and restore the lawn to its original condition. We always aim to leave the property cleaner than we found it, making it easy for the homeowner to welcome daily life again.
After the celebration, dismantling begins no later than one hour after the event’s official end. The tent is taken down in reverse order of installation, ensuring any decking or weighted sandbags are removed safely. Cleanup crews then grade the site, remove any temporary drainage, and restore the lawn to its original condition. We always aim to leave the property cleaner than we found it, making it easy for the homeowner to return to normal daily life.
Rain Plan and Weather Contingencies
North Georgia weather can be unpredictable, so a solid rain plan is essential for any outdoor gathering on a sloped yard. Our tents come with optional sidewalls that can be added in just minutes to convert an open canopy into a fully enclosed shelter. When sidewalls are deployed, they follow the contour of the slope, creating a water‑tight barrier that directs runoff toward the pre‑installed drainage trench.
North Georgia weather can be unpredictable, so a solid rain plan is essential for any outdoor gathering on a sloped yard. Our tents offer optional sidewalls that can be added in minutes to turn an open canopy into a fully enclosed shelter. When sidewalls are deployed, they follow the slope’s contour, creating a watertight barrier that channels runoff toward the pre‑installed drainage trench.
If a storm approaches after the tent is up, our crew can quickly raise the sidewalls and secure additional tarp extensions to cover any vulnerable edges. In the rare event that wind speeds exceed safe limits, we have a protocol for immediate deflation and safe removal of the structure. All contingency measures are communicated to the host during the initial planning meeting, so you can feel confident that the celebration will stay dry and safe, even if the clouds roll in.
If a storm approaches after the tent is up, our crew can quickly raise the sidewalls and add extra tarp extensions to cover any vulnerable edges. In the rare case that wind speeds exceed safe limits, we have a protocol for immediate deflation and safe removal of the structure. All contingency measures are discussed with the host during the initial planning meeting, so you can be confident the celebration will stay dry and safe, even if clouds roll in.
Yard Preparation Checklist
Use this checklist to ensure every step is completed before the tent arrives:
- Clear debris, rocks, and low‑lying vegetation.
- Mark the tent footprint with string or chalk.
- Determine slope degree and decide if decking is needed.
- Install interlocking decking panels for slopes >8 degrees.
- Compact soil and create a level platform.
- Dig a temporary drainage trench on the low side.
- Confirm placement of anchor points and sandbag locations.
- Schedule a final site walk with the DecoEvent ATL crew.
Use this checklist to make sure every step is finished before the tent arrives:
- Clear debris, rocks, and low‑lying vegetation.
- Mark the tent footprint with string or chalk.
- Determine the slope degree and decide if decking is required.
- Install interlocking decking panels for slopes greater than 8 degrees.
- Compact the soil and create a level platform.
- Dig a temporary drainage trench on the low side.
- Confirm anchor point locations and sandbag placements.
- Schedule a final site walk with the DecoEvent ATL crew.
Load‑In and Set‑Up Timeline
Our load‑in process is designed to minimize disruption to your property and keep the schedule on track:
- Day of event – 10 hours before start: trucks arrive, crew conducts site walk.
- Hours ‑ 8 to ‑ 6: assemble decking, grade soil, install drainage trench.
- Hours ‑ 6 to ‑ 4: position and secure anchoring system, place weighted sandbags.
- Hours ‑ 4 to ‑ 2: erect tent frame, attach sidewalls if needed.
- Hours ‑ 2 to ‑ 1: install lighting, draping, tables, chairs, and floor coverings.
- Hour ‑ 1 to event start: final safety inspection and guest‑ready walk‑through.
Our load‑in process is designed to keep disruption to your property to a minimum and stay on schedule:
- Event day – 10 hours before start: trucks arrive, crew does a site walk.
- Hours ‑ 8 to ‑ 6: assemble decking, grade soil, install drainage trench.
- Hours ‑ 6 to ‑ 4: position and secure anchoring system, place weighted sandbags.
- Hours ‑ 4 to ‑ 2: erect tent frame, add sidewalls if needed.
- Hours ‑ 2 to ‑ 1: install lighting, draping, tables, chairs, and floor coverings.
- Hour ‑ 1 to event start: final safety inspection and guest‑ready walkthrough.
Local Logistics and Permits
Loganville’s municipal regulations require a temporary structure permit for any tent larger than 20×20 feet. Our team will prepare the permit application on your behalf, using the exact address and ZIP you provide. We also coordinate with local utility companies if power outlets are needed for lighting or sound equipment.
Loganville’s municipal regulations require a temporary‑structure permit for any tent larger than 20×20 feet. Our team will prepare the permit application for you, using the exact address and ZIP you provide. We also coordinate with local utility companies if power outlets are needed for lighting or sound equipment.
Parking for delivery trucks is arranged in a driveway or on a nearby street with a temporary “No Parking” sign if needed. We advise residents to inform neighbors ahead of time to avoid any surprise parking restrictions.
Parking for delivery trucks is arranged in a driveway or on a nearby street with a temporary “No Parking” sign if needed. We recommend that residents notify neighbors in advance to avoid unexpected parking restrictions.
Comprehensive Event Checklist
Use this master checklist to keep every detail organized from the first call to the final cleanup.
- Provide full name, exact event address (street, city, ZIP), and county.
- Confirm event date, start time, and exact guest count.
- Share phone/WhatsApp number and email address for the written quote.
- Review tent size, layout, and anchoring plan based on yard slope.
- Approve draping, lighting, and décor options.
- Confirm bounce house or water slide selection, if desired.
- Discuss rain plan, sidewalls, and optional drainage.
- Finalize load‑in timeline and local parking logistics.
- Sign contract and provide credit‑card authorization.
- After the event, conduct walk‑through to confirm site restoration.
Use this master checklist to keep every detail organized from the first call through final cleanup.
- Provide full name, exact event address (street, city, ZIP), and county.
- Confirm event date, start time, and exact guest count.
- Provide phone/WhatsApp number and email address for the written quote.
- Review tent size, layout, and anchoring plan based on yard slope.
- Approve draping, lighting, and décor options.
- Confirm bounce house or water slide selection, if desired.
- Discuss rain plan, sidewalls, and optional drainage.
- Finalize load‑in timeline and local parking logistics.
- Sign contract and provide credit‑card authorization.
- After the event, conduct a walk‑through to confirm site restoration.
Frequently asked questions
What is the best tent size for a sloped yard in Loganville?
For moderate slopes a 20×30 or 20×40 works well; steeper sites benefit from a 30×60 to provide extra structural support and space for level decking.
How do you secure a tent on uneven ground?
We use a mix of angled ground stakes, weighted sandbags, and optional ground plates or temporary decking to distribute load and resist wind on sloped surfaces.
Can I have a dance floor on a steep incline?
Yes, by installing a level platform of interlocking panels or decking within the tent footprint, you can create a flat dance floor even on a steep yard.
What is the typical timeline for set‑up on a sloped yard?
Delivery begins about 10 hours before the event, with decking, tent erection, lighting, and furniture installed within 4‑5 hours, followed by a final safety check.
How do you handle rain on a sloped site?
Sidewalls are added to the tent, and pre‑installed drainage trenches channel water away from the base, keeping the interior dry during a rainstorm.
Do you provide a rain‑free guarantee for events?
We provide a rain‑plan that includes sidewalls and drainage; while we can’t control the weather, the plan ensures the event remains comfortable and safe.