
Understanding the Clermont Summer Climate
Clermont sits in Hall County just north of Gainesville and experiences warm to hot temperatures during the summer months, often climbing into the high eighties and nineties Fahrenheit. Humidity can add to the perceived heat, making shade and airflow essential for guest comfort. Knowing the typical weather patterns helps you plan the timing of your event, choose appropriate structures, and schedule hydration breaks.
The area’s terrain includes rolling foothills and many residential yards with mature trees, which can provide natural shade but may not cover the entire space you need for tables, chairs, and activity zones. By assessing the sun’s path across your property you can identify where supplemental shade will be most effective. This local insight ensures your summer party shade fans Clermont ga strategy starts with a realistic picture of the environment.
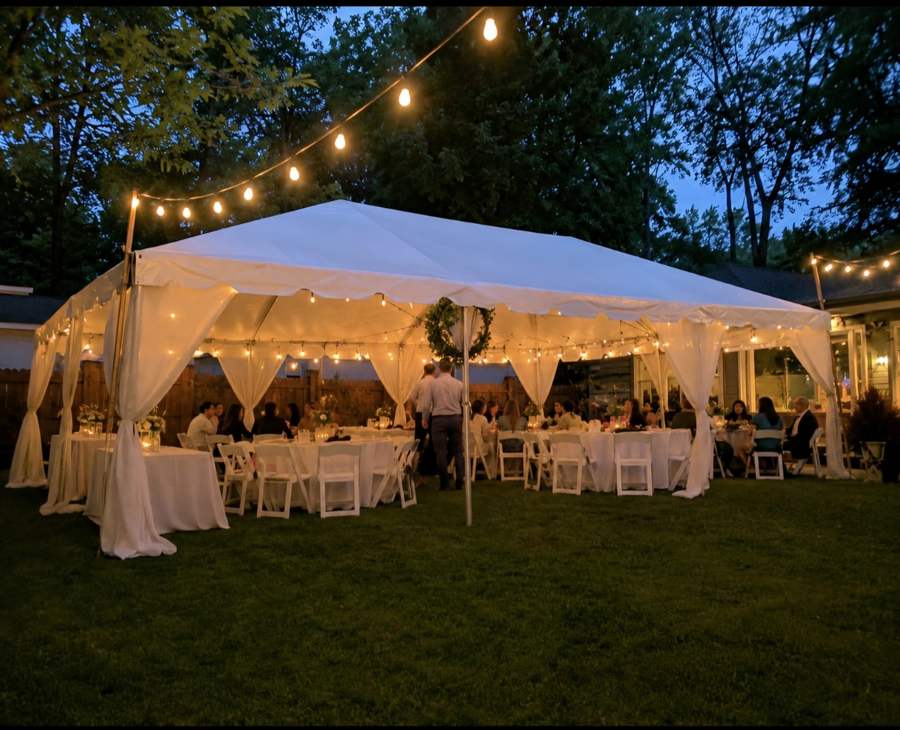
Choosing the Right Shade Solutions for Your Yard
DecoEvent ATL offers a range of tent sizes that can be anchored securely on grass or concrete, providing reliable coverage from direct sunlight. A 10×10 tent creates a shaded zone suitable for a small lounge or gift table, while a 20×30 tent can cover a dining area for up to sixty guests seated. Selecting the correct size depends on your guest count and the layout of tables, chairs, and any entertainment zones you plan to include.
When you combine tent sidewalls with optional draping, you reduce sun penetration and increase privacy. The sidewalls also help keep insects out, which is a common concern in Clermont’s outdoor settings. By matching the tent dimensions to your yard’s square footage and the expected flow of guests, you create a comfortable shaded foundation for the rest of your summer party preparations.
summer party shade fans Clermont ga: Fan Placement Strategies
Strategic fan placement moves air across shaded zones, lowering the perceived temperature and preventing stagnant heat pockets. Industrial fans from DecoEvent ATL are designed for continuous operation and can be positioned at ground level or on sturdy stands to maximize circulation. Placing fans at opposite ends of a shaded area creates a cross‑breeze that moves warm air out and draws cooler air in.
For optimal effect, angle the fans slightly upward to lift hot air away from seated guests while keeping the airflow gentle enough not to disturb table settings or decorations. If you have a longer space such as a 20×40 tent, consider using two fans spaced evenly along the length to maintain consistent airflow throughout. This approach ensures that the summer party shade fans Clermont ga concept works efficiently across the entire event area.
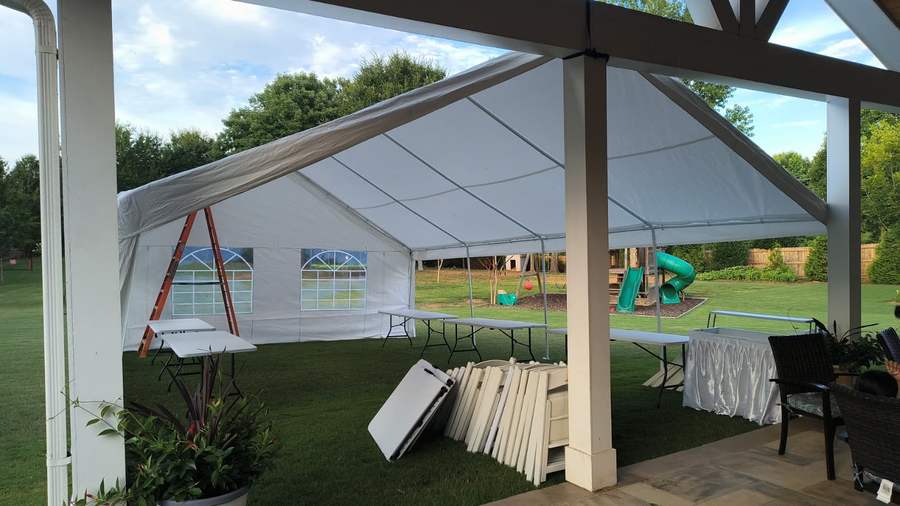
Hydration Stations: Keeping Guests Refreshed
Providing ample water and refreshing beverages is a key part of heat management. Set up clearly marked hydration stations near the entrance, beside the dining area, and close to any activity zones such as bounce houses or games. Use large beverage dispensers with ice and offer a variety of options including infused water, lemonade, and iced tea to cater to different tastes.
Encourage guests to refill frequently by placing reusable cups or eco‑friendly containers at each station. If you expect a larger crowd, consider adding a second station to reduce lines and keep everyone hydrated without delay. Proper hydration supports comfort and helps prevent heat‑related fatigue during your Clermont summer celebration.
Yard Preparation Timeline: From Setup to Teardown
Begin yard preparation at least two days before the event by clearing debris, mowing the lawn to an even height, and marking the areas where tents, tables, and fan stands will go. This early work prevents last‑minute surprises and gives you time to address any uneven ground that could affect tent anchoring. On the day before, lay out ground protection such as interlocking tiles if you anticipate heavy foot traffic on grass.
On the event day, start with tent installation early in the morning to allow time for adjustments and to secure sidewalls before guests arrive. Position fans and hydration stations after the tent is up, then arrange tables, chairs, and décor. After the celebration, reverse the process: dismantle fans, pack up equipment, and perform a quick yard clean‑up to leave the property in good condition.
Guest Count Math: Calculating Seating and Standing Capacity
Understanding how many guests each table and tent can accommodate helps you avoid overcrowding or underutilizing space. A 4‑round table comfortably seats four to six people, while a 5‑round table fits eight guests with room for up to ten when layout is optimized. A 6‑round table holds ten guests comfortably and can reach twelve only in a specially approved configuration. Rectangular tables follow similar logic: a 6‑foot rectangle seats six to eight, and an 8‑foot rectangle seats eight to ten.
When planning a cocktail‑style gathering, a 30‑inch Flash Furniture cocktail table accommodates two to four standing guests. As a rule of thumb, provide roughly one cocktail table for every eight to twelve attendees. Tent capacities also vary: a 10×10 unit shelters six to eight seated guests or eight to ten standing; a 10×20 covers sixteen to twenty seated or up to twenty‑five cocktail‑style; a 20×20 fits thirty‑two to forty seated; a 20×30 holds forty‑eight to sixty seated; a 20×40 accommodates sixty‑four to eighty seated or up to one hundred cocktail‑style; a 30×60 supports one hundred twenty to one hundred fifty seated or up to one hundred eighty cocktail‑style. These figures let you match your guest list to the right combination of tables, chairs, and shelter.
Yard Preparation: Ground Assessment and Setup Basics
Before any equipment arrives, walk the property to spot low spots, roots, or uneven patches that could affect tent stakes or weight bags. Mark the perimeter where the main tent will sit, leaving at least a two‑foot buffer around the edges for safe anchoring and easy access. If the soil is soft, consider using longer stakes or sandbags to increase holding power; on harder ground, rubber‑foot plates may be preferable.
Lay down protective ground covers such as interlocking foam tiles or heavy‑duty tarps in high‑traffic zones like entryways, beverage stations, and around bounce houses. This reduces wear on the grass and keeps the area clean. Verify that all utility needs—power outlets for fans, lighting, and any catering equipment—are within reach of extension cords rated for outdoor use, and keep cords taped down to prevent tripping hazards.
Load‑In Timeline: Step‑by‑Step Setup Schedule
Start the load‑in process at least three hours before the scheduled guest arrival time to allow for unloading, positioning, and fine‑tuning. Begin with the largest items—tents and sidewalls—so they have ample space to be unfolded and secured. Once the tent frame is up, attach the canopy, then secure it with stakes or weight bags according to the surface type.
Next, install any draping or interior linings, followed by the placement of tables and chairs. Arrange seating according to your floor plan, keeping aisles clear for easy movement. After furniture is in place, position industrial fans at the predetermined spots for cross‑breeze, then set up hydration stations, décor elements, and any entertainment units such as bounce houses or sound systems. Perform a final walkthrough to confirm that all items are level, stable, and ready for guests.
Rain Plan: Extra Precautions and Equipment Options
Even with a solid forecast, sudden showers can appear, so having a rain‑ready strategy is essential. DecoEvent ATL tents can be equipped with detachable sidewalls that zip on quickly to shield the interior while still allowing airflow. Keep these sidewalls folded and stored nearby so they can be deployed in minutes if precipitation begins.
Consider adding a secondary smaller tent—such as a 10×10 or 10×20—dedicated to food service or gift tables; this provides an extra layer of protection and keeps the main gathering area dry. If you anticipate prolonged rain, discuss with the team the possibility of using waterproof flooring inserts or raised platforms to keep equipment off soggy ground. Always have a clear communication channel open with the delivery crew so they can advise on the best timing for sidewall installation based on real‑time weather updates.
Local Logistics: Routes, Timing and Communication
The DecoEvent ATL warehouse in Pendergrass is roughly thirty‑two minutes from Clermont under typical traffic conditions, but travel time can vary with school‑zone delays, construction, or peak‑hour congestion. When you provide the exact street address, city, state, and five‑digit ZIP code, the logistics team can calculate the most efficient route and give you a reliable arrival window.
Confirm the delivery window at least a day in advance and request a courtesy call or text when the crew is ten minutes away. This allows you to have a point person on site to guide the truck to the correct entry point and to clear any obstacles such as locked gates or low‑hanging branches. If your event runs late into the evening, schedule the pickup for the following morning to give the crew ample time for breakdown and loading without rushing.
Party Essentials Checklist: Final Walk‑Through Details
Before guests arrive, verify that each item on the list is in place and functioning correctly. Check that the tent is firmly anchored, sidewalls are attached if needed, and that all zippers and fasteners are secure. Ensure fans are plugged in, set to the desired speed, and positioned for optimal airflow without blowing directly onto delicate décor.
Confirm that hydration stations are stocked with ice, beverages, and clean cups, and that signage is visible. Walk the perimeter to make sure tables are level, chairs are upright, linens are smooth, and any centerpieces or welcome mirrors are correctly positioned. Test any sound equipment, lighting, and bounce house blowers to confirm they operate safely and quietly.
After the celebration, repeat the walk‑through in reverse: account for all rental items, inspect for damage, and ensure the yard is free of debris, stakes, or leftover tape. Remove any temporary markings, fold and pack sidewalls, and load equipment onto the truck for return to the warehouse. Following this thorough checklist helps guarantee a smooth experience from start to finish and leaves both you and your guests with positive memories of a well‑organized outdoor event.
Frequently asked questions
What size tent works best for a backyard party of fifty guests in Clermont?
A 20×20 tent provides enough shaded space for fifty guests seated comfortably, with room for tables, chairs and a small activity zone while still allowing airflow around the perimeter.
How many industrial fans should I use for a 30×60 tent area to keep guests cool?
For a 30×60 tent, placing two fans at opposite ends creates effective cross‑ventilation; if the space is densely furnished, adding a third fan midway helps maintain consistent airflow throughout.
Where should I locate hydration stations to encourage guests to drink frequently?
Position hydration stations near the entrance, beside the main dining area, and close to any activity zones such as games or bounce houses so guests can easily access drinks without disrupting the flow of the event.
Can I use the tent’s sidewalls if a sudden rain shower begins during the party?
Yes, the sidewalls can be quickly deployed to shield the interior from rain while still allowing ventilation, protecting guests and equipment without needing to cancel the celebration.
What steps should I take to prepare the grass yard before tent installation in Clermont?
Clear debris, mow the lawn to an even height, mark the layout for tents and equipment, and consider laying ground protection tiles if heavy foot traffic is expected to prevent turf damage.
How far in advance should I confirm the delivery address with DecoEvent ATL for a Clermont event?
Provide the exact street address, city, state and ZIP code at least two days before the event so the logistics team can calculate the route, schedule the arrival time and avoid any delays.