
Understanding the Challenges of a Winter Outdoor Party Commerce GA
Hosting a winter outdoor party Commerce GA means facing low temperatures that can dip below freezing, especially after sunset. Wind chill from open fields or nearby highways can make the perceived temperature feel even colder, affecting guest comfort quickly. Without proper heating, attendees may leave early or avoid lingering, which impacts the flow of activities such as meals, speeches, or dancing. Recognizing these environmental factors early allows you to allocate resources for warmth solutions before the event day.
Begin by reviewing historical weather data for Commerce in the month of your event and checking the forecast a week ahead. Walk the chosen yard or driveway space to note any natural windbreaks like fences, trees, or buildings that could be leveraged. Determine the guest count you expect, as this influences the size of heating equipment needed and the layout of seating areas. Early site assessment also helps you plan for power access if you intend to use electric heaters or lighting that requires outlets. Additionally, think about ground conditions; frozen
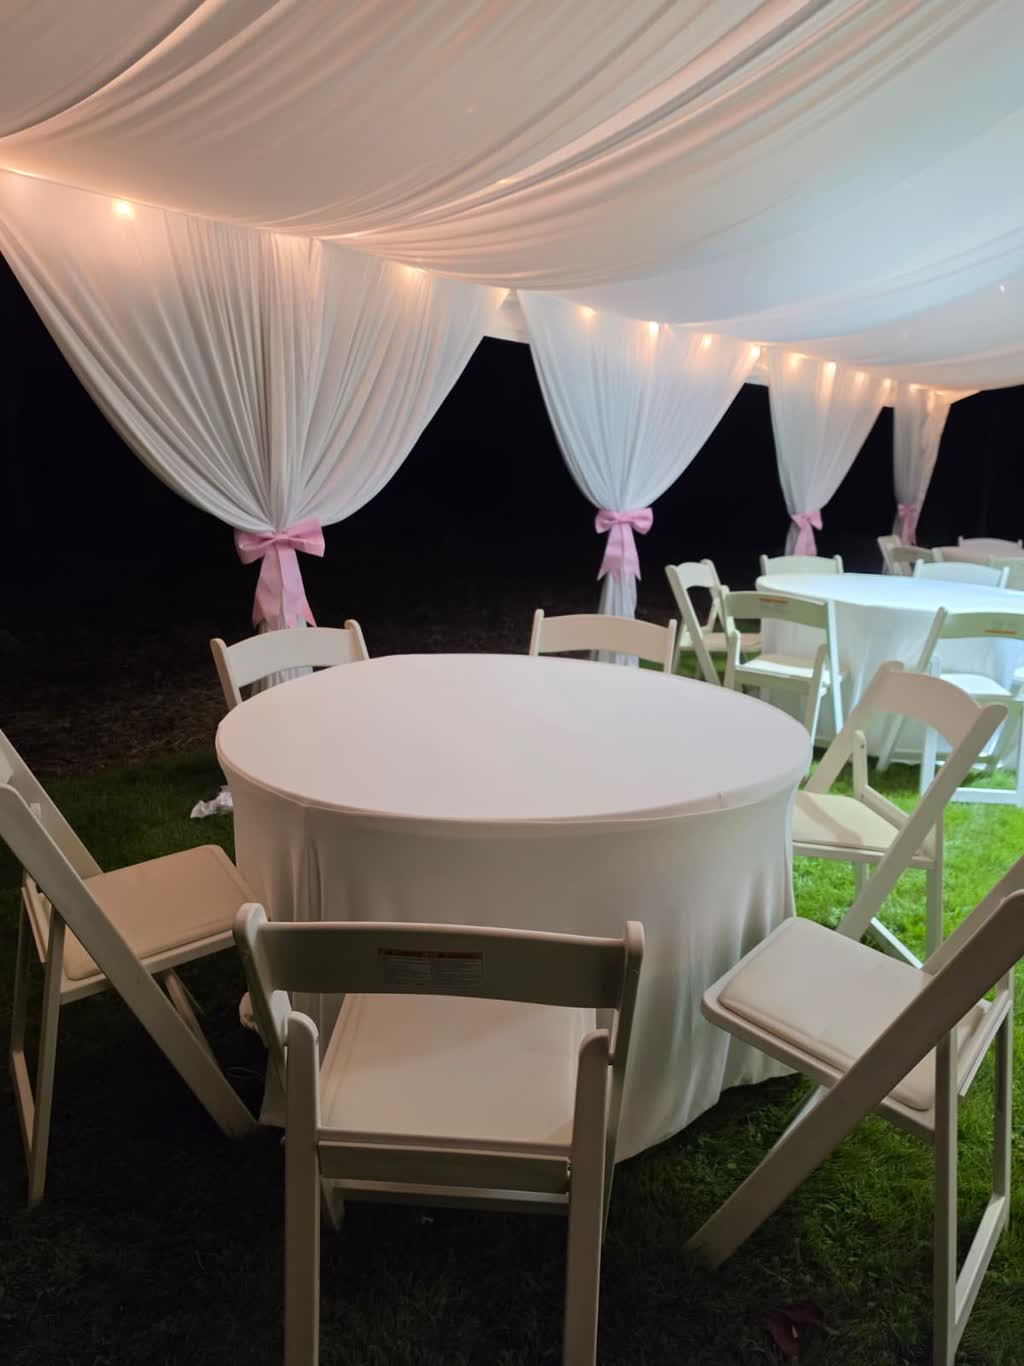
Guest‑Count Math for Heating and Seating
Calculating the right number of guests helps you size heating equipment, tables, chairs, and tents accurately. Start with your invitation list and add a buffer for unexpected attendees. Use the rule of thumb that each guest needs about 10 square feet of standing space or 12‑15 square feet for seated dining. Multiply the guest count by the appropriate factor to find the total area required for comfort.
For heating, estimate British Thermal Units (BTUs) needed. A common guideline is 20‑25 BTUs per square foot for outdoor heating in cold weather. Multiply the total area by the BTU factor to get the required heating power. Choose heaters whose combined output meets or exceeds this number, and distribute them evenly to avoid cold spots.
Seating arrangements follow similar math. If you plan banquet‑style tables, a 60‑inch round table seats 8‑10 guests comfortably. Rectangular 8‑foot tables accommodate 8‑10 guests. Divide the guest count by the table capacity to determine how many tables you need, then add a few extra for serving stations or a gift table.
Yard Preparation Steps
Inspect the surface where the tent will sit. Remove debris, rocks, and loose branches that could puncture the floor or create tripping hazards. If the ground is grass, consider laying a ground‑protective tarp or interlocking flooring to keep the tent clean and provide a stable base for chairs and tables.
Check for proper drainage. Water accumulation from melted snow or rain can make the area soggy and unsafe. If you notice low spots, add gravel or sand to improve runoff, or plan to place the tent on higher ground.
Mark utility locations before you drive stakes or anchors. Identify any underground irrigation lines, gas pipes, or electric cables to avoid damage. Use a portable stud finder or consult property plans if available.
Create clear pathways from the driveway or street to the event area. Lay down temporary walkway boards or gravel to keep guests’ shoes dry and to facilitate equipment movement.

Load‑In Timeline Overview
Begin load‑in early in the day to give yourself ample time for setup and troubleshooting. Aim to start at least six hours before the guest arrival time if you have a large tent, heating units, and multiple décor elements.
First, deliver and position the tent frame. Unroll the cover, secure it with stakes or weighted bags, and raise the structure using the provided poles and ratchets. Verify that the tent is level and taut before proceeding.
Next, install sidewalls if you are using them for wind protection or privacy. Attach the sidewall panels to the tent frame with the supplied clips or straps, ensuring a tight seal to keep cold air out.
After the tent is secure, lay down flooring or protective mats. Then place tables and chairs according to your layout plan. Keep a small buffer zone around heating units for safe operation.
Set up heating equipment next. Position propane or electric heaters at the calculated intervals, connect fuel sources or power cords, and test each unit to confirm proper ignition and heat output.
Proceed with lighting and décor. Hang LED tent lighting, bistro strings, and any uplighting fixtures. Add draping, centerpieces, and welcome mirrors as planned.
Finally, run a quick walkthrough to check for any loose items, verify that exits are clear, and ensure that all electrical connections are safely grounded.
Rain and Weather Contingency Plan
Even with a forecast, winter weather can shift rapidly. Prepare a rain plan that includes sidewalls, tent anchors, and quick‑drain flooring options. Sidewalls add a barrier against wind‑driven precipitation and help retain heat inside the tent.
Keep extra sandbags or weight plates on hand to increase anchoring strength if gusts pick up. Inspect the tent fabric for any tears or weak spots before the event, and carry a repair kit with tape and patches.
If conditions become unsafe—such as sustained winds over 20 mph, heavy snow accumulation, or ice‑covered ground—have a protocol to delay or relocate the event. Communicate the decision clearly to guests via text or phone, and offer to reschedule at no additional penalty.
Consider renting a portable heating trailer or additional propane tanks as a backup power source for heaters in case the primary supply runs low.
Local Logistics for Commerce, GA
Knowing the specific characteristics of Commerce helps you streamline delivery, setup, and breakdown. The town lies in Jackson County, with easy access via Highway 441 and Interstate 85. This proximity reduces travel time for our crew and equipment.
Check for any local ordinances regarding noise levels, tent height limits, or street closures if you plan to block a driveway for loading. Most residential areas in Commerce allow temporary event structures, but it is wise to verify with the city hall or county permit office if you expect a large setup.
Identify nearby suppliers for last‑minute needs, such as propane refills, extra batteries for lighting, or additional linens. Having a list of contacts saves time if something runs short during the event.
Plan for waste management. Provide clearly marked trash and recycling bins, and arrange for a pickup service or schedule a self‑haul to the local waste facility after the celebration ends.
Comprehensive Event Checklist
- Confirm date, start time, and exact address (street, city, state, ZIP) with the client.
- Verify guest count and note any special requirements (e.g., wheelchair access, children’s area).
- Review historical weather data and obtain a 7‑day forecast.
- Conduct site walk‑through: note windbreaks, ground condition, utility locations, and drainage.
- Select tent size based on guest count and layout (seated vs. cocktail style).
- Calculate heating BTU needs and reserve appropriate number of heaters.
- Arrange delivery of tent, flooring, tables, chairs, linens, and décor items.
- Schedule load‑in start time, aiming for at least six hours before guest arrival.
- Set up tent frame, cover, sidewalls, and anchoring system.
- Install flooring or protective mats.
- Place tables and chairs according to the layout plan.
- Position and test heating equipment.
- Hang lighting (LED tent lighting, bistro strings, uplighting) and install draping.
- Add centerpieces, florals, welcome mirrors, and any personalized signage.
- Conduct final safety check: clear exits, secure cords, stable heating units, and proper ventilation.
- Welcome guests, monitor temperature throughout the event, and adjust heaters as needed.
- After the event, begin breakdown: remove décor, turn off heaters, fold linens, and pack equipment.
- Inspect tent and accessories for damage; note any needed repairs for future use.
- Leave the site clean: collect trash, return any borrowed items, and ensure the property is in its original condition.
Understanding the Challenges of a Winter Outdoor Party Commerce GA
Hosting a winter outdoor party Commerce GA means facing low temperatures that can dip below freezing, especially after sunset. Wind chill from open fields or nearby highways can make the perceived temperature feel even colder, affecting guest comfort quickly. Without proper heating, attendees may leave early or avoid lingering, which impacts the flow of activities such as meals, speeches, or dancing. Recognizing these environmental factors early allows you to allocate resources for warmth solutions before the event day.
Begin by reviewing historical weather data for Commerce in the month of your event and checking the forecast a week ahead. Walk the chosen yard or driveway space to note any natural windbreaks like fences, trees, or buildings that could be leveraged. Determine the guest count you expect, as this influences the size of heating equipment needed and the layout of seating areas. Early site assessment also helps you plan for power access if you intend to use electric heaters or lighting that requires outlets. Additionally, think about ground conditions; frozen
Guest‑Count Math for Heating and Seating
Calculating the right number of guests helps you size heating equipment, tables, chairs, and tents accurately. Start with your invitation list and add a buffer for unexpected attendees. Use the rule of thumb that each guest needs about 10 square feet of standing space or 12‑15 square feet for seated dining. Multiply the guest count by the appropriate factor to find the total area required for comfort.
For heating, estimate British Thermal Units (BTUs) needed. A common guideline is 20‑25 BTUs per square foot for outdoor heating in cold weather. Multiply the total area by the BTU factor to get the required heating power. Choose heaters whose combined output meets or exceeds this number, and distribute them evenly to avoid cold spots.
Seating arrangements follow similar math. If you plan banquet‑style tables, a 60‑inch round table seats 8‑10 guests comfortably. Rectangular 8‑foot tables accommodate 8‑10 guests. Divide the guest count by the table capacity to determine how many tables you need, then add a few extra for serving stations or a gift table.
Yard Preparation Steps
Inspect the surface where the tent will sit. Remove debris, rocks, and loose branches that could puncture the floor or create tripping hazards. If the ground is grass, consider laying a ground‑protective tarp or interlocking flooring to keep the tent clean and provide a stable base for chairs and tables.
Check for proper drainage. Water accumulation from melted snow or rain can make the area soggy and unsafe. If you notice low spots, add gravel or sand to improve runoff, or plan to place the tent on higher ground.
Mark utility locations before you drive stakes or anchors. Identify any underground irrigation lines, gas pipes, or electric cables to avoid damage. Use a portable stud finder or consult property plans if available.
Create clear pathways from the driveway or street to the event area. Lay down temporary walkway boards or gravel to keep guests’ shoes dry and to facilitate equipment movement.
Load‑In Timeline Overview
Begin load‑in early in the day to give yourself ample time for setup and troubleshooting. Aim to start at least six hours before the guest arrival time if you have a large tent, heating units, and multiple décor elements.
First, deliver and position the tent frame. Unroll the cover, secure it with stakes or weighted bags, and raise the structure using the provided poles and ratchets. Verify that the tent is level and taut before proceeding.
Next, install sidewalls if you are using them for wind protection or privacy. Attach the sidewall panels to the tent frame with the supplied clips or straps, ensuring a tight seal to keep cold air out.
After the tent is secure, lay down flooring or protective mats. Then place tables and chairs according to your layout plan. Keep a small buffer zone around heating units for safe operation.
Set up heating equipment next. Position propane or electric heaters at the calculated intervals, connect fuel sources or power cords, and test each unit to confirm proper ignition and heat output.
Proceed with lighting and décor. Hang LED tent lighting, bistro strings, and any uplighting fixtures. Add draping, centerpieces, and welcome mirrors as planned.
Finally, run a quick walkthrough to check for any loose items, verify that exits are clear, and ensure that all electrical connections are safely grounded.
Rain and Weather Contingency Plan
Even with a forecast, winter weather can shift rapidly. Prepare a rain plan that includes sidewalls, tent anchors, and quick‑drain flooring options. Sidewalls add a barrier against wind‑driven precipitation and help retain heat inside the tent.
Keep extra sandbags or weight plates on hand to increase anchoring strength if gusts pick up. Inspect the tent fabric for any tears or weak spots before the event, and carry a repair kit with tape and patches.
If conditions become unsafe—such as sustained winds over 20 mph, heavy snow accumulation, or ice‑covered ground—have a protocol to delay or relocate the event. Communicate the decision clearly to guests via text or phone, and offer to reschedule at no additional penalty.
Consider renting a portable heating trailer or additional propane tanks as a backup power source for heaters in case the primary supply runs low.
Local Logistics for Commerce, GA
Knowing the specific characteristics of Commerce helps you streamline delivery, setup, and breakdown. The town lies in Jackson County, with easy access via Highway 441 and Interstate 85. This proximity reduces travel time for our crew and equipment.
Check for any local ordinances regarding noise levels, tent height limits, or street closures if you plan to block a driveway for loading. Most residential areas in Commerce allow temporary event structures, but it is wise to verify with the city hall or county permit office if you expect a large setup.
Identify nearby suppliers for last‑minute needs, such as propane refills, extra batteries for lighting, or additional linens. Having a list of contacts saves time if something runs short during the event.
Plan for waste management. Provide clearly marked trash and recycling bins, and arrange for a pickup service or schedule a self‑haul to the local waste facility after the celebration ends.
Comprehensive Event Checklist
- Confirm date, start time, and exact address (street, city, state, ZIP) with the client.
- Verify guest count and note any special requirements (e.g., wheelchair access, children’s area).
- Review historical weather data and obtain a 7‑day forecast.
- Conduct site walk‑through: note windbreaks, ground condition, utility locations, and drainage.
- Select tent size based on guest count and layout (seated vs. cocktail style).
- Calculate heating BTU needs and reserve appropriate number of heaters.
- Arrange delivery of tent, flooring, tables, chairs, linens, and décor items.
- Schedule load‑in start time, aiming for at least six hours before guest arrival.
- Set up tent frame, cover, sidewalls, and anchoring system.
- Install flooring or protective mats.
- Place tables and chairs according to the layout plan.
- Position and test heating equipment.
- Hang lighting (LED tent lighting, bistro strings, uplighting) and install draping.
- Add centerpieces, florals, welcome mirrors, and any personalized signage.
- Con