
Understanding the Basics of a Tent Layout for Team Building
When preparing a tent layout for a corporate team‑building event in Jefferson, Jackson County, the first step is to clarify the objectives of the day. Identify whether the agenda focuses on problem‑solving workshops, physical challenges, or informal networking, as each goal influences the spatial arrangement. A clear purpose helps decide how much open floor space is needed for activities versus seating for presentations or meals. By aligning the layout with the event’s goals, you create an environment that encourages collaboration while still providing comfort for participants throughout the day.
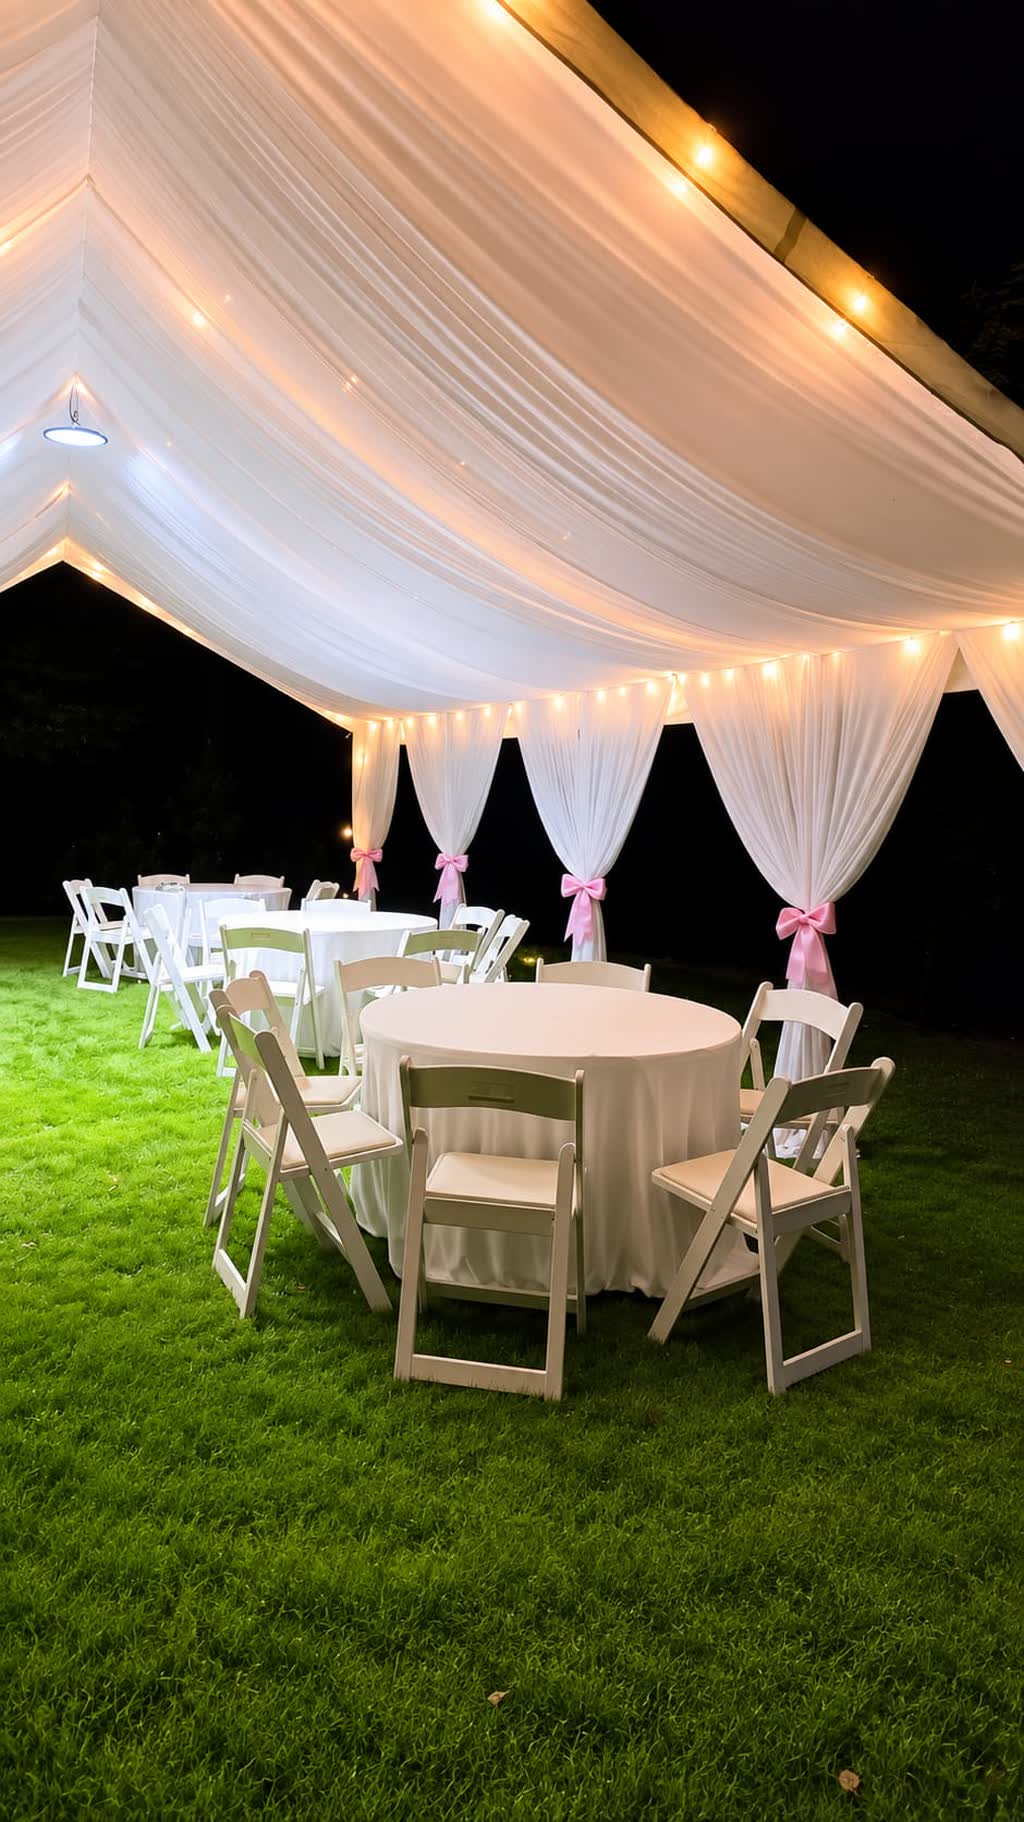
Next, assess the guest count and the type of activities planned. For example, a group of 60 participants might require a mix of seated areas for briefings and open zones for interactive games. Use the guest‑count math to determine the appropriate tent size and any additional structures such as a smaller canopy for a refreshment station. In Jefferson, many backyards off Old Pendergrass Road offer level ground that can accommodate a 20×30 foot tent for seating and a separate 10×20 foot area for activities. This approach ensures that each segment of the program has its dedicated space without feeling cramped.
Key Considerations for a Tent Layout for Team Building
One of the most important factors is the flow of movement between different zones. Sketch a simple diagram that shows entry points, activity stations, seating clusters, and any catering or refreshment areas. Ensure that pathways are at least three feet wide to allow easy transit, especially when participants carry equipment or materials for team challenges. In the neighborhoods around Jefferson High School, many homes have gentle slopes; leveling the ground or using temporary flooring can prevent tripping hazards and keep the event running smoothly.
Additionally, consider the orientation of the tent relative to sunlight and wind. Position the structure so that the main seating area avoids direct afternoon glare, which can make presentations difficult to view. In Jackson County, prevailing winds often come from the southwest; placing the tent with its back to this direction reduces wind pressure on the fabric and improves stability. Proper orientation also helps with natural ventilation, making the space more comfortable during longer sessions without relying solely on artificial cooling.
Selecting the Right Tent Size and Accessories
Based on the guest‑count math, choose a tent that comfortably accommodates seated guests while leaving room for activity zones. For a seated dinner or presentation for 80 people, a 30×60 foot tent provides ample space for round tables and a central aisle. If the program includes breakout sessions, consider adding a second tent, such as a 20×20 foot unit, to host smaller groups. This modular approach gives flexibility and avoids overcrowding a single large structure, which can hinder communication and movement.
Accessories such as sidewalls, flooring, and lighting enhance both function and aesthetics. Sidewalls are useful for blocking wind or providing a backdrop for branding elements. Interlocking flooring panels create a stable surface on grass, protecting the tent anchors and giving a professional look. LED tent lighting can be programmed to shift colors for different phases of the event, from energizing hues during active tasks to softer tones for reflective discussions. Remember to keep all cords safely tucked away to prevent tripping.
Yard Preparation and Site Logistics
Before the tent arrives, prepare the site by clearing debris, trimming overgrown vegetation, and marking any underground utilities. In Jefferson, many properties along Traditions of Braselton have mature trees; ensure that the tent’s anchor points stay at least five feet from tree trunks to avoid root damage and to maintain stability. Use a soil probe to check for soft spots; if necessary, add gravel or sand to create a firmer base for the tent’s weight distribution.
Logistics also involve coordinating the delivery window with the client’s schedule. The warehouse in Pendergrass is roughly a ten‑minute drive via Old Pendergrass Road, allowing for early morning arrival to beat daytime heat. Confirm that there is a clear path for the delivery truck, including sufficient turning radius and overhead clearance for low branches. Communicate any site‑specific restrictions, such as homeowners’ association rules, to the logistics team ahead of time to prevent delays on the day of the event.
Timeline Setup and Breakdown
Establish a realistic timeline that includes delivery, installation, event execution, and takedown. Aim to have the tent crew arrive at least two hours before the scheduled start time to allow for anchoring, raising the fabric, and installing any sidewalls or flooring. During this window, run a quick safety check: verify that all stakes are secure, that the tension is even, and that there are no loose ropes that could pose a hazard.
After the event concludes, allocate sufficient time for a systematic breakdown. Begin by removing any décor, then lower the sidewalls, followed by the tent fabric. Fold the fabric neatly to avoid creases that could affect future use. Load the equipment onto the truck and perform a final site sweep to ensure no stakes, cords, or trash are left behind. A well‑organized takedown not only protects the rental inventory but also leaves the client’s property in the same condition it was found.
Rain Plan and Contingency Strategies
Weather can change quickly in North Georgia, so having a rain plan is essential. Sidewalls can be added quickly to shield the interior from precipitation while maintaining airflow through vents. If the forecast calls for heavy rain, consider reserving an alternate date or identifying a nearby indoor community hall as a backup, keeping in mind that the primary service offering remains outdoor‑only. Communicate the contingency plan to participants in advance so they know what to expect if conditions shift.
Additionally, keep essential equipment such as blowers for bounce houses or extra lighting covered with waterproof tarps. If the event includes activities that cannot be moved indoors, such as certain physical challenges, have tarps and grounding mats ready to protect the gear. By preparing for wet conditions ahead of time, you demonstrate professionalism and keep the focus on the team‑building objectives rather than weather‑related disruptions.
Final Walkthrough and Client Communication
Before the event begins, conduct a final walkthrough with the client or their representative. Review the layout diagram, confirm the placement of key elements such as the presentation screen, activity stations, and catering area. Address any last‑minute adjustments, such as shifting a table a few feet to improve sightlines or adding extra chairs for unexpected attendees. This collaborative check ensures that the space matches the client’s vision and reduces the likelihood of surprises during the program.
Maintain open lines of communication throughout the day. Assign a point of contact from the rental team who can be reached via phone or WhatsApp for any immediate needs, such as adjusting lighting intensity or replenishing supplies. After the event, follow up with a brief survey to gather feedback on the layout and overall experience. This information helps refine future tent layouts for team‑building events in Jefferson and strengthens the partnership with local businesses seeking reliable outdoor solutions.
Guest‑Count Math
Start by deciding which table styles you will use. A 4‑foot round table comfortably seats four to six guests. A 5‑foot round table seats eight guests comfortably and can hold up to ten when space is optimized. A 6‑foot round table seats ten guests comfortably and, with an approved layout, can accommodate up to twelve. Rectangular tables work differently: a 6‑foot rectangle fits six to eight guests, while an 8‑foot rectangle fits eight to ten. Cocktail tables (30‑inch Flash Furniture) accommodate two to four standing guests; plan roughly one cocktail table for every eight to twelve attendees. Use these figures to calculate the total seated capacity and then add any open‑floor space needed for activities, buffets, or dance areas.
Yard Preparation
Begin with a thorough walk‑through of the yard. Remove loose sticks, rocks, and any debris that could interfere with tent stakes. Trim back overgrown shrubs and low branches that might pose a hazard during wind. Locate and mark any underground utilities such as gas lines, water pipes, or electrical cables before driving stakes. Verify the ground is level; if you notice soft spots, spread a thin layer of sand or gravel to create a firmer base for the tent’s weight distribution. Ensure there is at least a five‑foot clearance from tree trunks to avoid root damage and to keep anchoring secure.
Load‑In Timeline
Schedule the delivery truck to arrive early enough to avoid midday heat and to give the crew ample setup time. The crew should be on site at least two hours before the event start. During this window they will unload the tent components, position the base plates, drive stakes or use weighted anchors as appropriate, raise the fabric, and install sidewalls or flooring if requested. After the structure is up, perform a safety walk‑around: check stake tension, verify that all ropes are secured, and confirm that no equipment blocks egress paths. Once the safety check is complete, the site is ready for décor, furniture, and guest arrival.
Rain Plan
In addition to sidewalls, consider using clear vinyl covers over critical equipment such as sound systems, lighting consoles, and catering stations to keep them dry while still allowing visibility. Keep a supply of heavy‑duty tarps and sandbags on hand to quickly secure any loose edges if wind picks up. If the forecast indicates a prolonged downpour, discuss with the client the option of shifting the start time by an hour or two to avoid the worst of the rain, or moving certain activities to a covered area of the property that is not under the main tent. Document the agreed‑upon contingency steps in the event plan so everyone knows the procedure if weather changes.
Local Logistics
Confirm the exact event address, including street, city, state, and five‑digit ZIP code, to verify that the location falls within the service radius. Use the address to calculate the driving distance from the Pendergrass warehouse and to determine the appropriate arrival window for the delivery team. Communicate any specific access instructions, such as gate codes, low‑clearance bridges, or narrow driveways, well in advance. If the property lies in a subdivision with homeowners’ association guidelines, obtain any required approvals before the load‑in day to avoid last‑minute complications.
Checklist
- Exact guest count confirmed
- Tent size and quantity selected
- Table and chair quantities verified
- Flooring or interlocking panels ordered if needed
- Sidewall or vinyl cover requirements noted
- Lighting plan (LED tent lighting, bistro strings, etc.) outlined
- Sound system specifications (speakers, microphones) documented
- Catering area location and size determined
- Bounce house or water slide requirements (blower, hose, power) confirmed
- Access route for delivery truck cleared and checked for overhead obstacles
- Underground utilities marked and avoided
- Anchor points placed at least five feet from trees or structures
- Ground leveled and softened spots addressed with sand/gravel
- Safety walk‑through scheduled after setup and before guest arrival
- Contingency rain plan communicated to client and staff
- Final walkthrough with client conducted and approved
- Post‑event breakdown timeline assigned
- Final site sweep planned to remove all stakes, cords, and debris
Frequently asked questions
What guest count should I use to determine the right tent size for a team‑building event?
Estimate the number of participants who will be seated for meals or presentations, then add extra space for activity zones; a 30×60 foot tent works well for about 80 seated guests with room for breakout areas.
How far in advance should I confirm the date and tent footprint for a corporate event in Jefferson?
Aim to lock the date and tent layout four to six weeks ahead, especially during peak seasons, to ensure availability of the desired structures and accessories.
What yard preparations are needed before the tent crew arrives?
Clear debris, level any uneven ground, mark underground utilities, and keep a five‑foot clearance from tree trunks to maintain stability and safety during installation.
Can I add a second smaller tent for specific activities like a refreshment station?
Yes, pairing a large tent with a smaller unit, such as a 10×20 foot canopy, creates dedicated spaces for food or breakout sessions without overcrowding the main area.
What is the recommended width for pathways between activity stations and seating areas?
Keep walkways at least three feet wide to allow easy movement, especially when participants carry equipment or materials for team challenges.
How should I handle unexpected rain during an outdoor team‑building event?
Install sidewalls quickly to shield the interior, and have a contingency plan such as an alternate date or nearby indoor space ready if conditions worsen.